Ever been knee-deep in water, ready to reel in your big catch, only to realize your trusty fishing rod has betrayed you with an inconvenient snap? It’s Jake Marlin here, and I feel your pain, buddy, I’ve been there too. That’s why we’re going to take on this handyman challenge together, mastering the art of how to fix a broken fishing rod.
With the right tools and a little patience, we can breathe life back into your damaged rod, regardless of whether it’s a fresh, clean break or a more complicated fracture. This isn’t about just covering up the damage – we’re getting down to the nuts and bolts of restoring your rod, making it good as new, ready for your next fishing adventure.
In this comprehensive guide, you’ll learn tips, tricks, and step-by-step instructions I’ve accumulated over two decades of angling. So, ready to transform your broken rod into a tale of triumph? Let’s get started!
How to Assess the Damage on Your Fishing Rod
Understand the nature and extent of the damage to determine the right approach for repairs. Let’s dive into the intricacies of evaluating broken fishing rods through an experienced lens.
Identifying Break Types: Clean or Fractured?
Before diving into any repairs, you need to figure out what kind of break you’re dealing with. This is a critical initial step in learning how to fix a broken fishing rod. Generally, breaks fall into two distinct categories: clean breaks and fractured breaks.
Take a clean break, for example. It’s a single, straightforward crack, and more often than not, it’s an easier fix. On the flip side, a fractured break is more of a challenge, with multiple splinters or shattered sections. It’s kind of like the difference between cracking a twig in half and smashing a glass bottle. Spotting which is which makes a world of difference when you’re repairing. You see a neat, single split? That’s your clean break. Multiple splinters or shattered bits? You’ve got yourself a fractured break. Pinning down the right type helps you pick the best method for learning how to fix a broken fishing rod effectively.
Gauging the Severity of the Damage
After identifying the break type, the next step is assessing how severe the damage is. The extent of the break will let you know whether a simple repair will cut it or if you need to replace part of the rod altogether.
For minor damage like small fractures or chips, you can often get away with a wrapping technique. This involves using strong thread and epoxy resin to wrap and seal the damaged area, giving it back its strength. Picture sewing up a small tear in your favorite fishing jacket—simple, effective, and back in action in no time.
But if the rod has significant splintering or multiple cracks, a simple repair might not be in the cards. In these cases, replacing the damaged section may be your best bet. Give the break a thorough examination and consider how it impacts the rod’s overall integrity. Deciding on the best course of action based on this evaluation is essential for understanding how to fix a broken fishing rod effectively.
Getting Ready to Repair Your Broken Fishing Rod
Before plunging into the actual repair process, it’s crucial to prepare and gather all necessary materials. This step ensures a smooth and effective repair of your broken fishing rod.
Essential Material Checklist for Fishing Rod Repairs
Before diving into how to fix a broken fishing rod, ensure you have all essential materials on hand.
These include a fishing rod repair kit, which features tools and adhesives specially designed for rod repairs.
Fine grit sandpaper is necessary for smoothing the broken edges of the rod, while a razor blade will help make precise cuts and trims. Two-part epoxy resin is crucial for creating a strong bond between broken sections.
Ensure you have a durable, round object like a small nail, sewing needle, or round fiberglass rod to reinforce the break effectively. Strong thread, preferably nylon or silk, along with thread coating such as polyurethane finish, will add strength and durability to the repair.
Finally, tape is required to hold sections in place during the drying process.
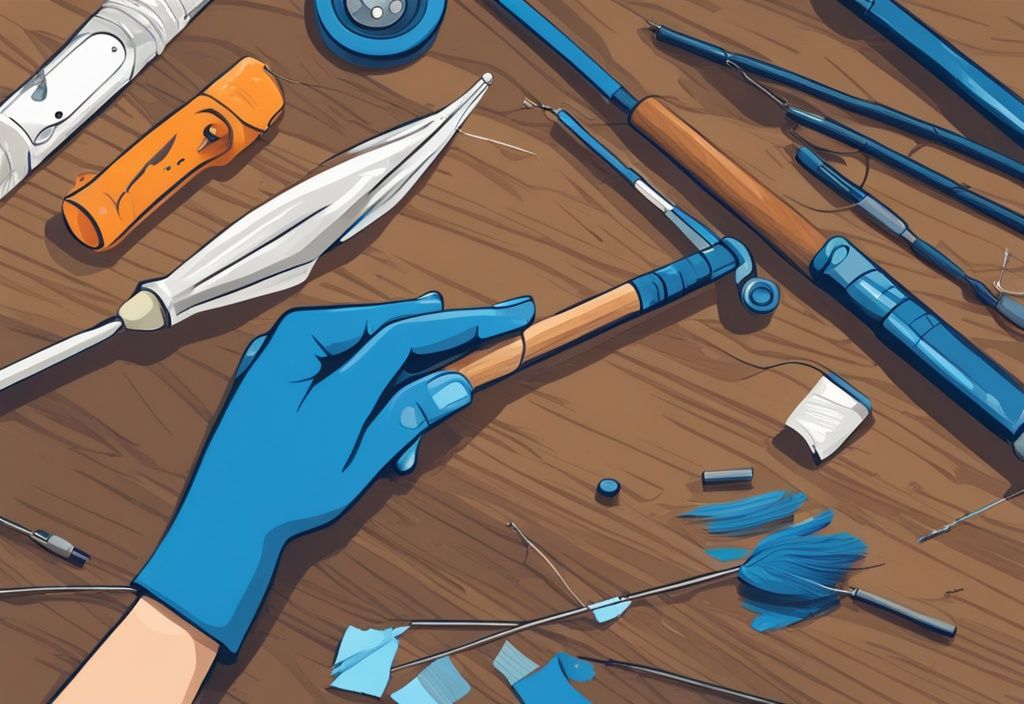
Preparation Essentials: Cleaning and Prepping the Break Area
The initial step in how to fix a broken fishing rod involves thoroughly cleaning the damaged area. Any dirt or debris can affect the effectiveness of your repair, so it’s crucial to ensure the rod ends are spotless.
Next, use fine grit sandpaper to smooth out the broken ends. This sanding helps to straighten the ends and free them of any splits or additional cracks, which is vital for a seamless repair process.
Proper preparation of the broken area ensures that the adhesive bonds more effectively, providing a durable and long-lasting repair.
Your Step-By-Step Guide on How to Mend a Broken Fishing Rod
Breaking your fishing rod can be a real mood killer, especially when you’re looking forward to a peaceful day by the water. But fear not, because understanding how to fix a broken fishing rod can get you back to casting in no time. Whether it’s a simple clean break or a more complicated fracture, here are detailed steps to mend your gear effectively. Let’s dive in!
For Simple Breaks
Experiencing a clean break on your fishing rod can be frustrating. However, if you know how to fix a broken fishing rod properly, you can restore your rod with ease.
The Art of Sanding Broken Ends Smoothly
First things first, grab some fine grit sandpaper and gently sand the broken ends of your rod until they are smooth and free from splits. This step is crucial as it prepares your rod for the next stages of repair.
Selecting the Right Insert to Assist Your Repair
Next, you’ll need a durable, round object that fits snugly into the hollow sections of your broken rod. Consider using a small nail, a sewing needle, or even a round fiberglass rod. Make sure this insert fits at least one inch into both ends of the break.
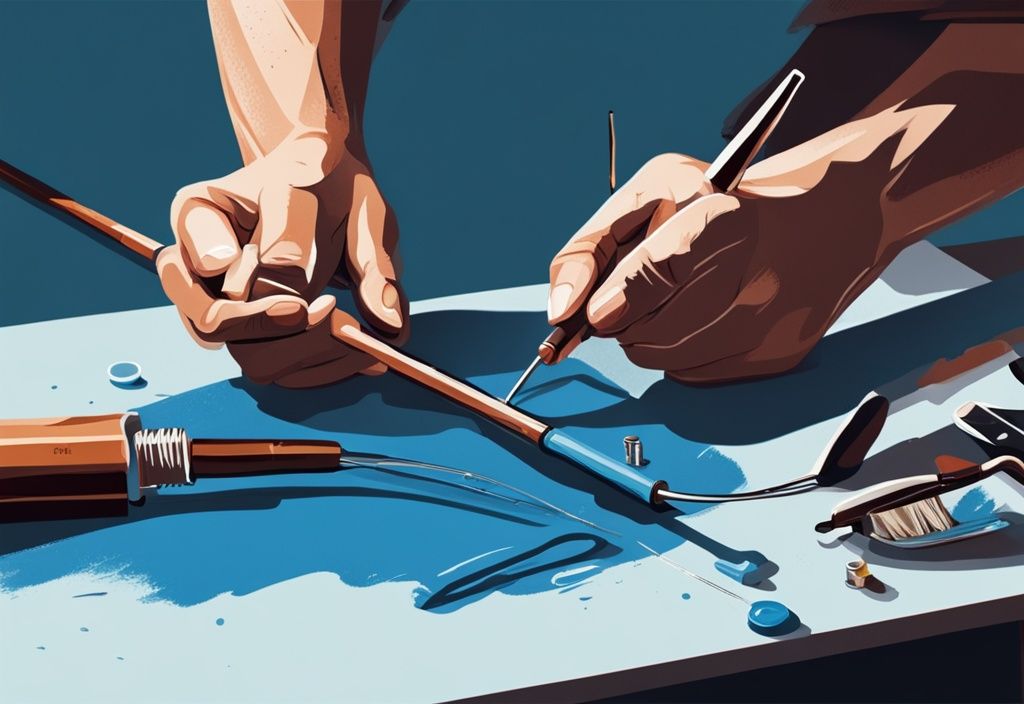
Aligning and Gluing: The Critical Steps
Carefully drizzle some crazy glue into the hollows before inserting your selected object into both broken ends. Ensure it goes in at least an inch. Here’s where you need to be quick and precise – align the two parts of your rod to achieve a straight mend before the glue sets.
Reinforcing Your Repair: Why Sewing Thread Matters?
For added reinforcement, tightly wrap sewing thread around the break area, covering at least an inch on either side. Secure the thread with a knot and trim any excess. This creates a tight, supportive bond.
Sealing Your Repair: The Final Touch
To finish, coat the wrapped thread with a thin layer of crazy glue and let it dry thoroughly. This seals the thread in place and adds an extra layer of protection to your repair, ensuring it holds up during your next fishing trip.
For Fractured Breaks
When your rod suffers a fractured break, complete with splinters or shattered sections, the repair method varies slightly. Knowing how to fix a broken fishing rod of this nature is crucial for binding those fibers back together effectively.
How to Prepare Your Splintered Break for Repair
Start by carefully sanding the jagged edges of the break until they’re smooth. Proper prep work is essential here, as it ensures an even bond when you move on to the next steps.
The Role Epoxy Resin Plays in Your Repair
Apply a thin coating of two-part epoxy resin to the splintered area. This resin acts as a binder for the rod fibers, initiating the repair process. Be sure to cover all splinters evenly.
Getting Your Thread Wraps and Seals Right
After the epoxy resin application, wrap the area tightly with a strong thread like nylon or silk. Follow this with another layer of epoxy resin over the thread. This method fortifies the repair, making it durable and long-lasting.
By meticulously following these steps, you’ll become adept at how to fix a broken fishing rod, ensuring you’re always ready for your next angling adventure. So, the next time your rod snaps, you’ll know exactly what to do to keep on fishing. Tight lines!
Advanced Tips for Repairing Severely Damaged Fishing Rods
When a fishing rod sustains severe damage, it often requires more than a simple patch job to get it back in action. Delving into advanced repair techniques can save your beloved rod from the trash and get you back to your favorite fishing spots.
Replacing an Unfixable Rod Section
Effectively Removing the Beyond-Repair Section
Got a rod with a section that’s beyond repair? The first step is snipping out that damaged bit. With a razor blade or a similar cutting tool, make precise cuts to remove the broken area. Clean cuts are crucial—no one wants extra splinters or more damage.
How to Fit and Secure a Fresh Rod Section
Next, you’ll need to find a replacement section. This could be a section from another rod or a specially purchased piece. Ensure the new section fits snugly within the existing rod. A tight fit is key to maintaining the rod’s structural integrity and functionality.
Mastering the Epoxy Resin Application for a Snug Fit
Mix up a two-part epoxy resin and apply it to both the existing rod end and the replacement section. Slide the new piece into place, making sure it aligns perfectly. For those new to fly fishing, you might wonder what a tippet in fly fishing is and how it fits into your gear setup. The epoxy resin works wonders by creating a seamless and sturdy connection.
The Importance of Drying Time in Rod Repairs
Once the new section is fitted, secure it with string and tape. Let the epoxy cure for at least 24 hours. Giving the resin ample time to dry ensures a strong bond that can handle regular fishing adventures.
Enhancing Your Repair with Final Touches
Sanding 101: Making Your Repair Smooth
After the epoxy resin has completely dried, grab some fine-grit sandpaper. Gently sand down any excess adhesive to achieve a smooth finish. This step is essential for a seamless look and feel, making your repair nearly invisible.
Why You Should Add a Finishing Coat
A finishing coat of polyurethane is like the cherry on top. It gives your rod a professional, glossy appearance and adds an extra layer of protection. This final touch enhances the durability of your repair.
Restringing and Hardware Replacement: Last Steps
With the structural repair complete, it’s time to restring the rod and replace any necessary hardware, like rod guides. This final step ensures your fishing rod is fully functional and ready for your next adventure, restoring its original performance capabilities.
Put Your Repair to Test
After all the effort you put into learning how to fix a broken fishing rod, it’s time to see if the repair holds up. Let’s dive into the nitty-gritty of testing your handiwork and ensuring you’re set for a worry-free adventure on the water.
How to Test Your Newly Repaired Fishing Rod
Start by giving your rod a gentle cast into the water. This isn’t just about seeing if it works; it’s about feeling if everything clicks into place as it should. Observe how the rod reacts to the cast. Does it feel solid and well-balanced in your hand? For those curious about optimizing their fishing setup, understanding what max drag means on a fishing reel is essential. If it wobbles or seems flimsy, you might need to reinforce your repair a bit more.
This initial cast is crucial. It’s like the appetizer before the main course of your fishing trip. If your repaired rod can’t even perform a basic cast, it’s better to fix it now than deal with a break out on the water. Reel in your line and do it again a couple of times, just to be sure.
Ensuring Your Rod’s Tensile Strength is Restored
Next up, let’s talk tensile strength—basically, how much pressure the rod can take before it gives out on you. This is where things get interesting. You’ll want to bend the rod gently, simulating the kind of stress it will face while battling a fish. Apply an even, steady pressure and watch closely for any signs of weakness.
As you bend the rod, listen for any unusual creaks or pops. These sounds can signal that the repair isn’t as solid as you thought. Remember, knowing how to fix a broken fishing rod means understanding the nuances of its strength and functionality. If you do find weak spots, don’t get discouraged; just take it as another step in the repair journey.
Every bend, every cast, and every reeling motion should flow smoothly. By thoroughly testing your rod’s tensile strength, you’ll avoid any unexpected mishaps out on the water. Plus, it adds a layer of confidence to your fishing game—knowing your gear won’t let you down when it’s time to reel in the big one.
Evaluating your repair isn’t just a one-off task. It’s part of an ongoing process to ensure your gear remains in top form. So take your time, enjoy the process, and remember: a well-repaired rod can bring years of reliable performance, making every fishing trip more enjoyable.
How to Handle Your Fishing Rod Repair Safely
Repairing a broken fishing rod is a meticulous and rewarding task, but safety is paramount. Knowing how to handle sharp tools and adhesives correctly will not only keep you safe but also ensure a more effective repair.
Navigating Sharp Objects and Adhesives with Caution
Repairing a broken fishing rod requires the use of sharp objects and powerful adhesives, necessitating stringent safety measures to prevent injuries and accidents. Proper preparation and mindfulness can ensure a successful and safe repair process.
Prioritize Safety Gear
Always equip yourself with appropriate safety gear including gloves and safety glasses. Gloves provide a barrier against potential cuts or punctures when using tools like razor blades, while safety glasses shield your eyes from splinters or adhesive splashes.
Maintaining a Clean and Organized Workspace
Working in a clutter-free area reduces the risk of accidentally cutting yourself or knocking over adhesive containers. Ensure you have ample lighting to clearly see the break and the tools you are using. Keep your workspace organized, only having the materials and tools you need within reach.
Using Sharp Tools Correctly
When cutting away damaged sections or preparing the break area, use a razor blade with precision. Always cut away from your body and keep your fingers clear of the blade’s path. Store blades securely when not in use to prevent accidental injuries.
Handling Adhesives Safely
Adhesives like two-part epoxy resin and crazy glue can be hazardous if mishandled. Wear gloves to avoid direct skin contact and work in a well-ventilated area to prevent inhaling fumes. Follow the manufacturer’s instructions for application and curing times to ensure a strong, durable bond without compromising your health.
Avoiding Cross-Contamination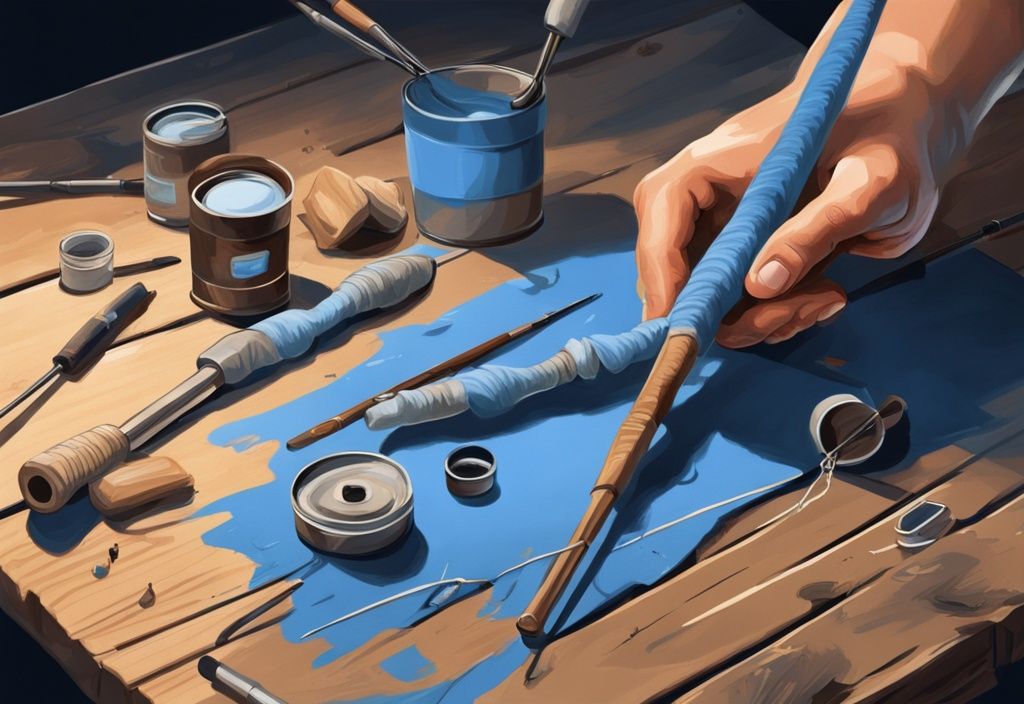
Keep tools used for applying adhesives separate from other tools to avoid accidental cross-contamination. Clean any spills immediately with appropriate cleaning products and always dispose of adhesive containers and used tools responsibly.
Stay Attentive and Take Breaks
Repairing a fishing rod can be a meticulous task. Stay attentive throughout the process to avoid mistakes that could lead to injury. Taking regular breaks can help maintain your focus and ensure each step is completed safely and correctly.
By following these precautions, you can navigate the repair process safely and efficiently, ensuring your fishing rod is restored without any unnecessary risks. This approach not only protects you but also enhances the quality of the repair, making your fishing rod ready for future adventures.
Avoid Future Breaks: Your Guide to Preventive Measures
Ensuring your fishing rod stays in top-notch condition is crucial for a seamless fishing experience. From proper storage to regular inspections, taking these steps seriously can save you from the hassle of dealing with a broken rod.
Keeping Your Rod in Prime Shape through Proper Storage and Care
Proper storage and care are absolutely vital for the longevity of your fishing rod. Imagine this: You’ve just returned from a long day of fishing, sun setting in the background, and all you want to do is crash on the couch. But take an extra minute to store your rod correctly. Always choose a safe location where it’s not going to be knocked over or stepped on—designated rod holders or vertical wall racks are perfect for this.
Extreme temperatures? Humid conditions? Avoid them like the plague, because they can wear down your rod’s material over time. And when it comes to transporting it, always use a protective case. By following these steps, you’ll significantly cut down the chances of facing a broken fishing rod due to negligent storage.
The Importance of Regular Rod Inspections
Regular inspections are the unsung heroes of rod maintenance. As a seasoned angler, I can’t stress enough how a quick check-up can save you loads of trouble later on. After each fishing trip, dedicate a few minutes to closely examine your rod. Focus on the rod guides, the tip, and the ferrules—they’re the usual suspects for damage.
Spotting tiny cracks or nicks? Address them immediately before they turn into major problems. Think of it like brushing your teeth—you wouldn’t skip that, right? By catching these early signs, you not only extend the life of your rod but also maintain its optimal performance, making it less likely you’ll need to fix a broken fishing rod. Regular inspections and prompt repairs ensure your gear is always in tip-top shape for your next fishing adventure.
Conclusion
Your Go-To Recap on Repairing a Broken Fishing Rod
Knowing how to fix a broken fishing rod starts with identifying the type of break you’re dealing with. Picture this: a clean break demands a different approach compared to a fractured, splintered one. Got the idea? Once you’ve pinpointed the damage, gather all the essential materials. Think fishing rod repair kit, fine grit sandpaper, and some trusty two-part epoxy resin.
The first step? Cleaning and sanding the affected area are crucial for a solid fix. For those simple breaks, align the parts and glue them using a sturdy insert. Wrap it up with thread for that added strength. It’s like a bandage but for your rod! When handling fractured breaks, you’ll need to dive into a more intricate binding process. Using epoxy and thread wrapping, restore your rod’s integrity efficiently. Finish off each repair with a smooth sanding and a protective finish. This ensures durability and keeps your trusty rod functional for the next adventure.
When Should You Consider Professional Help?
While learning how to fix a broken fishing rod can be empowering, there are moments when calling in the pros is the best move. If dealing with significant splintering, multiple cracks, or when feeling unsure about handling the repair, it’s wise to seek professional help. Professional rod repair services have the expertise and specialized tools to tackle severe damages.
Moreover, if your rod holds high sentimental or monetary value, a professional intervention might be the best course to preserve its quality. They ensure your rod is restored to its optimal condition, prepping you for many more exciting fishing trips.
In the end, whether DIY or professional, ensuring your rod is ready for action keeps you out there, casting and catching, just like the good old days. Tight lines!
Your Burning Questions Answered
What Materials Do I Absolutely Need for My Fishing Rod Repair?
When learning how to fix a broken fishing rod, you’ll need a fishing rod repair kit, fine grit sandpaper, and a razor blade to prepare the surface. Essential items like two-part epoxy resin, a durable round object for reinforcing the break, and strong thread (nylon or silk) are crucial. Don’t forget a thread coating like polyurethane finish and some tape to wrap things up. These materials ensure a comprehensive and durable repair, making your rod sturdy and dependable once again.
Can I Handle a Complex Fishing Rod Repair Myself?
Absolutely, you can tackle most complex fishing rod repairs on your own with the right tools and plenty of patience. However, if your rod is badly damaged, seeking professional help might be the wiser choice to ensure safety and effectiveness in the repair process. Think of it like patching a puncture in a dam—some jobs just need a professional touch.
How Long Will My Repair Take to Dry Properly?
This is always a biggie. Proper drying time for the repair, especially when using epoxy resin, is crucial. Typically, letting the epoxy resin dry for 24 hours will secure a strong, durable bond, making your repaired fishing rod ready for action. Trust me, patience here pays off big time.
.
Is It Economical to Repair an Ageing Fishing Rod?
Repairing an ageing fishing rod can be economical if the rod is of high quality and costly to replace. But for cheaper rods, buying a new one might be smarter. Think of it like fixing an old car—sometimes it’s worth it, and sometimes it’s just best to move on. Assess the cost of materials and the rod’s value before making your decision.
How Can I Tell When a Fishing Rod is Beyond Repair?
A fishing rod is considered beyond repair if it has multiple breaks, significant splintering, or severe damage affecting its structural integrity. Imagine trying to repair a shattered glass vase. If it can’t be safely or effectively fixed, it’s probably time to replace the rod. Your safety and the joy of the sport should always come first.